Spatial standards are the guiding principles for creating environments that accommodate human movement, comfort, and cultural expression. These standards are more than just measurements—they’re the foundation for how spaces are shaped, taking into account physical, cultural, and perceptual needs. In this article, we’ll explore the essentials of human spatial standards, including how to apply ergonomic data, create comfortable spaces, and incorporate cultural nuances to enhance user experiences. Let’s dive into how spatial design affects our daily lives and the key techniques to get it right.
1. Importance of Human Spatial Standards
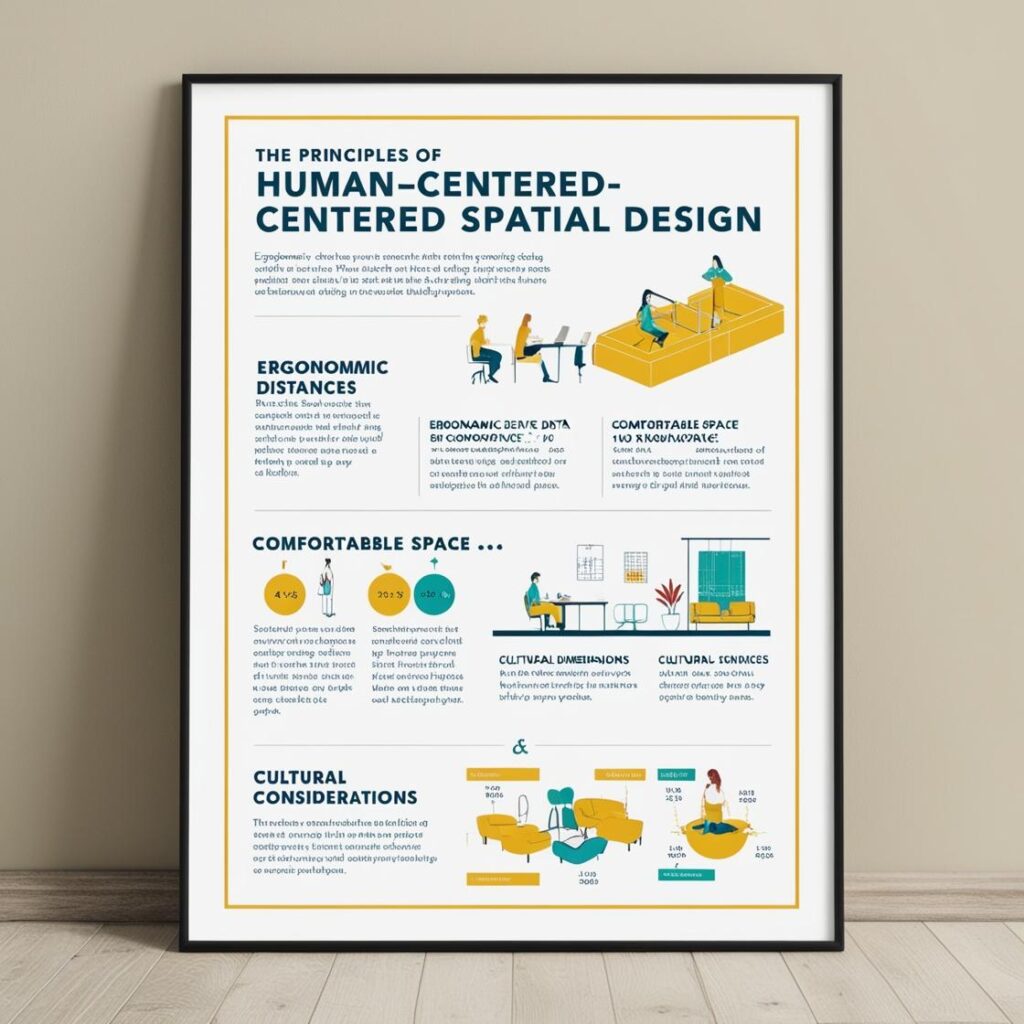
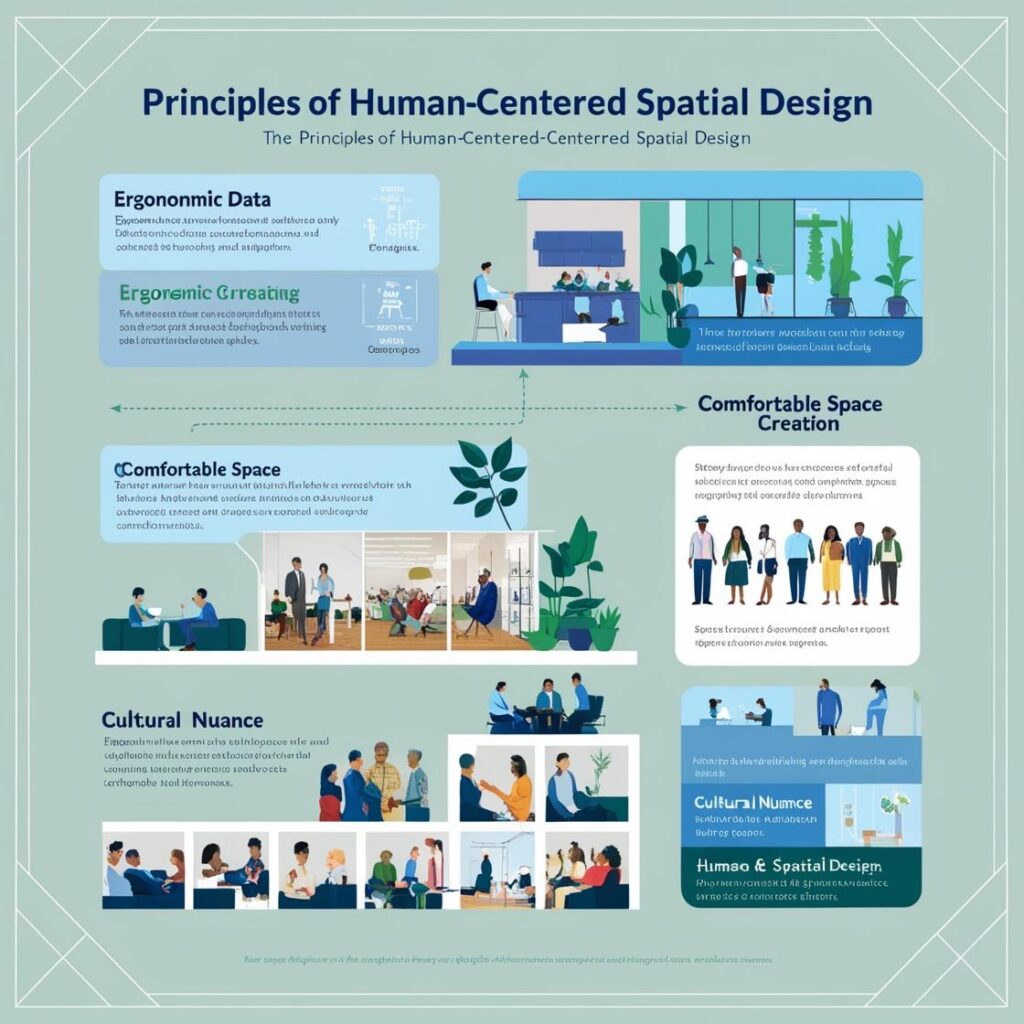
Human spatial standards consider factors such as ergonomics, psychology, cultural rituals, and aesthetics. These standards are developed from data on human measurements and behaviors, making them essential for designing spaces that meet both functional and emotional needs. Standards generally address:
- Safety Clearances: Ensure physical space around people and objects to prevent accidents.
- User Comfort: Psychological elements that make users feel at ease.
- Cultural Protocols: Traditional spatial arrangements that honor cultural practices.
- Aesthetic Choices: Design elements that reflect personal or cultural tastes.
Each of these areas influences how spaces are structured, and adjustments often need to be made to accommodate different cultural expectations. This is especially relevant in a globalized world where spaces serve diverse users.
2. Key Techniques for Designing Human Spatial Settings
A. Ergonomic Measurements for Space Planning
Ergonomics informs the dimensions used in spatial standards. These measurements vary by age, gender, and body size and are often based on percentile rankings. Here’s how to apply these measurements practically:
- Interior vs. Exterior Dimensions: Indoor spaces generally require less room than outdoor spaces. For example, a 10×10-foot indoor dining area may need to expand to 12×12 feet for outdoor use, as open environments require more space for comfort.
- Standing and Sitting Measurements: Use anthropometric data (like the figures from Henry Dreyfuss Associates) to determine minimum standing and sitting dimensions in both public and private spaces.
Actionable Tip: When designing for a specific group (e.g., children or seniors), adjust ergonomic measurements to match the body dimensions typical for that demographic.
B. Peripheral Vision and Visibility in Space Design
Peripheral vision is vital in creating comfortable, intuitive spaces. The average person’s peripheral vision cone spans a 28-degree angle, allowing them to perceive up to 20-22 feet ahead. This impacts how walkways, paths, and outdoor areas should be laid out.
- Pedestrian Vision Zones: Design spaces with a floor distance of 6,000–6,600 mm (20–22 ft) to accommodate the typical peripheral vision range.
- Clearances in Garden Paths: Maintain a vertical clearance of around 7 feet and horizontal clearance of 5 feet for garden pathways to allow easy mobility and visibility.
Actionable Tip: For outdoor spaces where movement is essential, like pathways or event areas, ensure visibility and clearance are optimized for comfort and safety.
C. Designing Intimate and Social Spaces
Creating spaces for different types of interaction, whether intimate or social, requires careful planning of clearances and layout:
- Intimate Garden Settings: Small gardens should have clearances of about 2-3 feet in width to allow close interaction while providing enough space for movement.
- Dining Areas: Outdoor dining spaces should be at least 40-60% larger than indoor counterparts to avoid feeling cramped in the open.
Actionable Tip: Use soft landscape elements like low plants or pruned trees to define intimate spaces within larger areas, giving a sense of enclosure without overcrowding.
3. Vehicular and Pedestrian Spatial Requirements
When designing mixed-use spaces, ensuring harmony between vehicular and pedestrian areas is crucial. Vehicular dimensions are often larger, demanding more clearance and space for maneuvering without compromising pedestrian safety.
- Setbacks and Clearances: Design adequate setbacks to protect pedestrians from vehicles, lights, and other structures.
- Pedestrian Walkway Widths: Depending on expected usage, pedestrian walkways should vary in width. Figure 210-7, for example, suggests different widths based on activities, such as 5–8 feet for leisurely strolls or up to 12 feet for busier thoroughfares.
Actionable Tip: When designing areas where pedestrians and vehicles mix, consider the “contextual elements” that scale spaces, such as planters, trees, and benches, to maintain clear sightlines and safe navigation.
Summary for Quick Reference (Instagram/Infographic Format)
- Safety Clearances: Keep people and objects a safe distance apart to prevent accidents.
- User Comfort: Balance visual and physical space to create a welcoming atmosphere.
- Cultural Protocols: Adjust spatial standards to respect local customs and traditions.
- Ergonomic Measurements: Use data on human dimensions to define minimum spatial requirements.
- Interior vs. Exterior Space: Outdoor spaces often need 40-60% more room than indoor areas.
- Peripheral Vision: Design pedestrian areas with visibility zones of 20-22 feet.
- Pathway Clearances: Ensure vertical clearance of 7 feet and horizontal of 5 feet in gardens.
- Vehicular Safety: Implement setbacks and clearances to protect pedestrians.
By following these standards, you can create spaces that are not only functional but also adaptable and considerate of diverse human needs and behaviors. These guidelines can be essential in fostering environments that feel both comfortable and culturally attuned.
It looks like you’re referencing detailed design standards and dimensional requirements from the Time-Saver Standards for Landscape Architecture. This resource covers a wide range of guidelines on pedestrian walkways, parking lot design, vehicular and pedestrian landscapes, playgrounds, sports areas, maintenance and loading dock areas, as well as various parking configurations.
If you need specific summaries or particular data from these sections, I can help break down the information for your design or planning needs! Let me know which sections are most relevant, or if you need assistance interpreting any of the figures mentioned.
Vehicular and Parking Design
The standards provide detailed guidance on parking dimensions, spatial requirements, turning radii, overhang clearances, and slope data for different vehicle types, including subcompacts, large vans, trucks, and recreational vehicles. Key figures include:
- Parking Lot Configurations:
- Double Loaded Aisle Parking (Figure 210-25a): Efficiently maximizes parking spaces and includes single aisles that allow vehicles to park on both sides. This layout is commonly used in recreational or high-turnover areas. It includes buffer areas for vegetation and trees, providing both screening and shade.
- Single Aisle Parking Variations (Figures 210-25b and c): Demonstrates configurations with small planting buffers or dead-end aisles. The latter is generally not recommended for high-traffic areas due to limited maneuverability.
- Parking Patterns and Layouts:
- 90° Parking (Figure 210-24): Most efficient in terms of space usage, allowing the highest number of cars per acre. The figure indicates that as stall width narrows, the aisle width should increase for efficient vehicle maneuvering.
- Angled Parking (30°-60°): Results in fewer spaces per acre compared to 90° parking. It may be used when lateral space is constrained, though it often requires a wider travel aisle to allow vehicles to back out safely.
- Overhang and Clearance Requirements:
- Rear Overhang (Figure 210-15): Standard recommendations suggest a 1,500 mm (5 ft) overhang to avoid contact with trees, walls, or other structures. This clearance can be critical in climates where snow removal is necessary.
- Turning Radii (Figure 210-17): Details interior (R1) and exterior (R) radii, essential for the design of turns, entrances, and exits in parking facilities.
Loading Docks and Turnaround Spaces
For freight and transit vehicle accommodations, Figures 210-27 through 29 provide key dimensions and turning radii:
- Loading Dock Specifications:
- Closed and Open Docks (Figure 210-27): Describes spatial requirements for open versus closed loading docks, emphasizing clearance heights, widths, and lengths specific to semitrailers and other large vehicles. Standard semitrailers are typically 55 ft long, 13.5 ft high, and 8 ft wide.
- Turning Radii (Figure 210-29): Illustrates the radii needed for large vehicles, such as buses and semitrailers, to maneuver efficiently within a facility.
Community Planning and Recreation Standards
The tables provide community planning benchmarks, including recommended facility-to-population ratios and parking requirements:
- Playground Equipment and Area Standards:
- Play Areas by Equipment Type (Table 210-2): Outlines spatial needs for various playground elements like slides, swings, and balance beams, along with their capacity for users. For example, a medium jungle gym requires 46 m² and accommodates up to 20 children.
- General Open Space: For games and free play, a general open space requirement of 929 m² (10,000 ft²) per area is suggested for ages 6-10, enabling enough room for informal play.
- Sports Facility Standards:
- Parking Ratios (Table 210-1a): Outlines minimum parking requirements for different sports facilities to accommodate regular use and occasional spectators. For example, a baseball diamond might need 15+ parking spaces for players and an additional 20 for spectators.
- Field Dimensions and Layouts: Football, soccer, baseball, and other sports areas are provided with specific area recommendations per thousand population to guide community development efforts. For instance, a soccer field requires approximately 3,344 m² (36,000 ft²), and a community may aim for one field per 5,000 to 15,000 people, depending on local demand.
Parking Landscape Design and Green Space Integration
The standards recommend integrating vegetation to create a more visually appealing and environmentally friendly parking landscape:
- Vegetative Buffers and Planting Strips (Figures 210-26a-e): Incorporating plantings in parking lot designs can help manage stormwater, reduce heat, and create a more pedestrian-friendly environment. Planting islands between parking bays (Figure 210-26b and 210-26c) provide ample space for tree growth and add shade to parking areas.
- Informal Layouts and Skewed Bays (Figure 210-26d): Allows designers to preserve existing trees and landforms within parking spaces by adjusting the layout accordingly. This approach is common in large lots where natural elements can be retained.
Specialty Vehicles and Maintenance Access
In areas requiring access for maintenance, service, or emergency vehicles, clearances and turning radii should be planned carefully:
- Maintenance and Emergency Vehicles (Figure 210-30): Provides dimensions and operational space requirements for maintenance and emergency vehicles, ensuring smooth access to all areas without compromising pedestrian zones or landscaped areas.
Marinas and Boat Docks
For marina and dock designs, standards outline spatial and structural requirements based on boat dimensions and types:
- Dock Facilities for Boats:
- Slip and Catwalk Dimensions (Figure 210-32): Typical dock layouts should accommodate a range of boat sizes, from smaller recreational boats to larger sailboats up to 80 ft. Design considerations include access ease, safety, and mooring stability.
- Boat Launching Ramps (Figure 210-33): Essential criteria for ramps include slope gradients, durability for heavy loads, and vehicle maneuvering space for boat trailers.
These sections of the Time-Saver Standards for Landscape Architecture provide an invaluable guide for landscape architects, urban planners, and civil engineers in creating safe, functional, and aesthetically pleasing spaces. For more specific design calculations or further details on a particular section, let me know, and I can elaborate.
This text from Time-Saver Standards for Landscape Architecture provides detailed guidance on landscape design principles, including specifications for pedestrian and vehicular spaces, parking lot design, and maintenance areas. Here’s an overview of some key points outlined in the figures:
- Pedestrian Walkways and Ramps: Standards for walkway width and height accommodate accessibility and comfort for pedestrians. Covered stairways and ramps require minimum vertical clearance for safety.
- Parking Design:
- Parking Lot Elements: Figure 210-13 emphasizes the integration of plantings, landforms, and other structures in parking areas to create a smoother transition to pedestrian pathways. Minimizing hard pavement surfaces is encouraged to allow stormwater infiltration.
- Vehicle Dimensions and Maneuvering: Figures 210-14 through 210-25 cover various vehicle dimensions and turning radii, critical for designing parking and maneuvering areas to accommodate vehicles of different sizes. Parking configurations such as 90-degree and angled parking, along with associated aisle widths, are illustrated.
- Double Loaded Aisles: Figures 210-25 to 210-26 showcase layouts for double-loaded aisles, with considerations for plantings, drop-off zones, and buffer zones to improve parking aesthetics and functionality.
- Playground and Sports Facilities:
- Space Standards for Sports Facilities: Table 210-1 details area requirements for sports amenities, like volleyball and basketball courts, with suggested capacities per 1,000 people.
- Parking Ratios: Table 210-1a lists recommended parking allocations per sports facility, suggesting minimum spaces for activities such as archery and baseball to accommodate players and spectators.
- Truck and Freight Access:
- Loading Docks and Transport Vehicles: Figures 210-27 through 210-29 provide spatial requirements for freight loading docks, bus and semi-truck turning radii, and other factors essential for efficient large vehicle access in commercial settings.
- Maintenance Areas:
- Special Vehicle Dimensions: Figure 210-30 indicates the spatial needs for maintenance and specialized vehicles, facilitating the planning of storage and movement of such equipment on-site.
This extensive set of guidelines supports landscape architects in designing spaces that are functional, safe, and visually integrated, accommodating both human and vehicular circulation in various environments.
The detailed information you’ve shared contains valuable data on marina facilities, vehicular and parking standards, playground and sports area requirements, and various guidelines for community planning in landscape architecture. Here’s a summary of key points:
- Marina Facilities:
- Marina docks accommodate boats ranging from 4,265 mm (14 ft) to 24,380 mm (80 ft), covering a variety of sailboats common in coastal and large lake settings.
- Typical design components include slips, catwalks, and boat launching ramps, each with specified design criteria.
- Community Planning Standards:
- Tables 210-1 to 210-4 provide general area standards based on North American community data.
- For more active or high-use areas, these standards may require an increase of 25-50% to reflect local usage levels and regional needs.
- Vehicular Dimensions and Parking Standards:
- Specific parking dimensions for various vehicle types (subcompact, compact, midsize, etc.) ensure appropriate clearances and maneuverability.
- Parking designs should accommodate overhangs, turning radii, and include plantings and drainage considerations to enhance both function and aesthetics.
- Suggested patterns for parking layouts, such as 90° and angled parking, cater to different spatial configurations and traffic flow.
- Playground and Sports Areas:
- Space and equipment guidelines are outlined for playgrounds and sports fields, including recommendations for soccer fields, tennis courts, and other recreational facilities.
- Parking ratios for various sports facilities (e.g., archery, baseball, and golf) are suggested to ensure sufficient parking based on typical facility usage.
- Freight and Specialized Vehicles:
- Loading dock dimensions and turning radii are detailed to accommodate larger vehicles, with specific data on semitrailers, buses, and maintenance vehicles.
- Clearance and spatial requirements for specialized vehicles are highlighted to support operational efficiency in facility planning.
These standards, based on “Time-Saver Standards for Landscape Architecture,” are foundational for landscape architects and urban planners, enabling the design of efficient, safe, and aesthetically pleasing public spaces tailored to community and environmental needs. Let me know if you need a deeper analysis of specific sections, or further assistance with any architectural project that aligns with these guidelines!
This is an extensive set of guidelines, specifications, and standards related to land use planning, building orientation, site layout, and infrastructure needs in various development scenarios. Here’s a breakdown of some key points:
Development Types and Component Use Areas
- Single-Family vs. Multi-Family Development: Each type has different land use allocations for schools, playgrounds, parks, shopping centers, and community facilities. Acreage requirements generally increase with the number of families and population density.
- For example, in single-family developments, the allocation for playgrounds ranges from 2.75 acres (for 1000 people) to 6 acres (for 5000 people).
- Multi-family developments also have similar breakdowns but with slightly different acreage values.
Parking Requirements by Land Use
- Parking standards vary by type of establishment:
- Residential: Single-family homes require 2 spaces per dwelling, while apartments vary based on unit size.
- Commercial: Offices require 3 spaces per 1000 square feet, whereas recreational facilities like bowling alleys require parking based on the number of units (e.g., 4 spaces per alley).
- Public Buildings: Facilities such as museums require 1 parking space per 300 square feet.
Site Planning and Energy Conservation
- Site Analysis and Assessment: Emphasizes minimizing site disruption, adapting existing structures, and assessing climate, topography, and vegetation. These factors help determine energy-efficient placement of buildings and infrastructure.
- Infrastructure Considerations: Encourages using existing transportation networks, promoting alternative transport, and consolidating utility corridors to reduce environmental impact.
- Building Orientation: Buildings should be positioned to maximize solar access, reduce heating/cooling needs, and maintain site harmony with natural features like wind patterns and vegetation.
Landscape and Resource Conservation
- Soil, Vegetation, and Water Management: Includes protecting existing vegetation, managing surface water runoff, and conserving soil by avoiding extensive grading or clearing.
- Adaptive Reuse and Community Impact: Focuses on reusing existing sites or structures to reduce environmental impact while potentially enhancing community value.
These guidelines are aimed at creating efficient, environmentally sound developments while meeting practical needs for utilities, transportation, and recreational areas. They’re adapted from sources like Time-Saver Standards for Landscape Architecture, which compiles best practices for sustainable and strategic site planning.
The document you shared outlines comprehensive design guidelines to improve outdoor accessibility, primarily based on ADA (Americans with Disabilities Act) standards and other federal guidelines such as the UFAS (Uniform Federal Accessibility Standards). Here’s a summary of the main sections to highlight key concepts:
- Introduction and Purpose: This section explains the intent to create accessible outdoor environments for all individuals, addressing the importance of eliminating barriers. Universal Design is emphasized as a fundamental approach that seeks to include everyone, regardless of ability, in all spaces.
- Important Design Concepts:
- Universal Design: A philosophy focused on inclusive design that avoids segregation and considers a diverse range of abilities.
- Accessible Route: Continuous, unobstructed paths that connect major site elements, such as parking, facilities, and entrances, ensuring all users have access.
- Graduated Difficulty of Access: This concept is vital for outdoor recreation, providing various trail difficulties to suit users’ abilities without compromising recreational experiences.
- Design Considerations for Disabilities:
- Specific accommodations for disabilities include those for visual, mobility, hearing, and manual impairments, as well as learning impairments.
- Visual Impairments: Elements like tactile warning strips, visual cues, and barrier-free paths help guide those with limited vision. Use of Braille signage and ensuring objects don’t protrude into paths are critical considerations.
- Design Elements and Details:
- Walkways and Surfaces: Clear, firm, and level paths with tactile warning strips at intersections or hazardous zones.
- Stairs, Ramps, and Handrails: Specifications ensure these are accessible, with appropriate slopes, widths, and handrails.
- Seating and Furnishings: Placement and design should accommodate various needs, avoiding barriers that could impede mobility.
- Parking and Loading Zones: Close to entry points, ensuring no grade changes, making transitions from vehicles to pathways smooth.
- Lighting and Signage: Adequate lighting and clear signage using international symbols to aid navigation.
- Accessible Recreation:
- Trails: Includes a classification system with signage indicating trail difficulty levels, allowing users to choose paths according to ability.
- Camping, Picnicking, Swimming, Fishing, and Boating: Specific guidelines are provided to ensure these areas are accessible to all, with suitable pathways, accessible cooking facilities, and well-designed access routes.
- Guidelines for Public Spaces:
- Accessible design strategies for parks, playgrounds, and paths encourage the integration of inclusive spaces, promoting accessibility for individuals with disabilities in both urban and natural settings.
These guidelines are designed to comply with ADAAG and UFAS standards, with considerations for specific impairments, emphasizing the importance of creating accessible and inclusive environments for outdoor recreation and everyday use.
The passage you shared provides comprehensive guidelines for accessible design in outdoor spaces. Here’s a summary and breakdown of the key points for designing inclusive environments, focusing on mobility, sensory, and manual impairments, along with general considerations for accessible routes:
- Visual Impairments:
- Tactile and Auditory Cues: Individuals with limited vision often use tactile warning strips, canes, or auditory cues to navigate. Tactile strips should forewarn about level changes, vehicular areas, and hazards. Objects should not protrude into pathways above 675 mm (27 inches).
- Orientation and Mobility: Environmental sounds, smells, and even temperature can help individuals map spaces cognitively. Features like textured materials in walkways can guide pedestrians with visual impairments safely.
- Mobility Impairments:
- Pathway Design: Ramps, stairways with handrails, and accessible walking aids are essential for individuals with mobility limitations. Ramps should not exceed an 8.33% slope for long distances, and handrails must be present on stairs and ramps.
- Level Changes and Rest Areas: Avoid level changes that aren’t ramped. Places to stop and rest should be level and allow space for wheelchair users without obstructing pathways.
- Hearing Impairments:
- Visual Cues: For those who rely on visual signals, flashing lights or visual alerts should accompany audible alarms like automobile horns or fire alarms. Clear signage and symbols for directions are critical when sound-based cues are inaccessible.
- Manual Impairments:
- Ease of Use for Controls: Accessible equipment like doors, elevators, and vending machines should have controls that can be operated with a closed fist (push plates, large buttons, etc.). Placement should consider reach limitations for wheelchair users.
- Learning Impairments:
- Signage and Symbols: Graphic symbols can help individuals with learning impairments identify crosswalks, hazardous areas, and important landmarks, supporting cognitive mapping and memory. Symbols can also benefit those who may struggle with reading.
- General Design Recommendations for Accessibility:
- Walkways and Routes: Paths should be wide enough (minimum 36 inches) to accommodate wheelchairs. They should have clear passing spaces, be continuous, and have appropriate signage when a route isn’t accessible.
- Surface and Slope: Walkway surfaces should avoid abrupt level changes (greater than 1/2 inch). Cross slopes should be gentle (max 2% in developed areas, 3% in natural areas).
- Detectable Warnings: Tactile strips at hazardous areas like curbs, ramps, and crossings are essential. They should be visually and texturally distinct but not so contrasting as to cause tripping hazards.
- Parking and Amenities:
- Accessible parking should meet ADA standards, with clearly marked spaces located near entryways. Other amenities, such as restrooms, drinking fountains, and seating areas, should be accessible and follow ADAAG specifications.
Each section highlights essential elements for an accessible, inclusive outdoor environment that considers varied user needs and adheres to ADA and UFAS guidelines. Implementing these features contributes to safer, more navigable spaces for everyone, regardless of physical or sensory abilities.
Creating Inclusive Outdoor Spaces: A Comprehensive Guide to Accessible Design
Understanding Accessibility
Accessibility in outdoor environments goes beyond mere compliance with regulations; it is about creating welcoming, functional spaces for everyone. As we design pedestrian walkways, parks, and public areas, we must consider the diverse needs of users, particularly those with visual, mobility, hearing, manual, and learning impairments.
Key Considerations for Different Impairments
1. Visual Impairments
Tactile and Auditory Cues: Individuals with visual impairments often rely on various sensory cues to navigate their surroundings. Tactile warning strips serve as essential guides to alert pedestrians to level changes, vehicular zones, and other hazards. These strips should be installed in locations such as curb ramps and street crossings, ensuring they are detectable by canes.
Orientation and Mobility: For many, environmental sounds (like traffic), smells (from nearby landmarks), and temperature differences help in cognitive mapping. Incorporating features like textured materials in pathways not only aids navigation but also enhances the sensory experience.
2. Mobility Impairments
Pathway Design: Designing accessible pathways requires careful consideration of ramps and stairways. Ramps should have a maximum slope of 8.33% for longer distances, and handrails must be present on both sides of stairs and ramps to provide support.
Level Changes and Rest Areas: Unobstructed routes are critical. Any level changes that cannot be ramped create barriers for wheelchair users. Additionally, it’s essential to include resting areas along pathways, ensuring they are level and wide enough for a wheelchair user to rest safely without blocking the accessible route.
3. Hearing Impairments
Visual Cues: For those with hearing impairments, audible alarms need visual counterparts—flashing lights or signals can effectively convey warnings, such as fire alarms or traffic alerts. Clear signage that employs symbols alongside text will provide necessary directional information.
4. Manual Impairments
Ease of Use for Controls: Accessibility in manual functions is crucial. Controls for elevators, vending machines, and doors should be designed for ease of use, allowing operation with a closed fist (such as push plates or large buttons). They must be placed within reach of individuals in wheelchairs, ensuring that no one faces barriers while attempting to use them.
5. Learning Impairments
Signage and Symbols: Graphic symbols can greatly assist individuals with learning difficulties by highlighting critical areas such as crosswalks, danger zones, and orientation landmarks. Such visual cues can significantly enhance cognitive mapping and memory, making navigation more intuitive.

General Design Recommendations for Accessibility
Walkways and Routes
To create effective pedestrian routes, pathways should be at least 36 inches wide to accommodate wheelchairs. When designing these pathways, consider the following:
- Passing Spaces: Include designated areas for users to pass each other, especially in narrow sections.
- Continuous Paths: Ensure that accessible routes are continuous and connected, avoiding disjointed segments that may confuse or mislead users.
Surface and Slope
Select walkway surfaces that minimize abrupt changes in height—no more than 1/2 inch is recommended. Slopes on accessible routes should be gentle; a maximum cross slope of 2% is advised in developed areas, while a 3% slope can be acceptable in more natural settings.
Detectable Warnings
Integrate tactile warning strips at key areas such as curbs and street crossings. These should be visually and texturally distinct but should avoid creating tripping hazards themselves. The design should prioritize tone contrast to ensure they are noticeable.
Parking and Amenities
Accessible parking spaces are vital. Follow ADA guidelines to ensure an appropriate number of designated spots, located as close to entryways as possible. Other essential amenities should also be accessible:
- Restroom Facilities: Must comply with accessibility standards.
- Drinking Fountains: Should be at a height and design usable for all.
- Public Telephones: Must be reachable by individuals in wheelchairs.
- Seating Areas: Create spaces with accessible seating.
- Informational Signage: Provide clear, visual direction aids throughout the area.
- Elevators and Escalators: Ensure they are functional and accessible.
Conclusion
Designing accessible outdoor spaces requires thoughtful consideration and adherence to guidelines like the ADAAG and UFAS. By addressing the needs of individuals with various impairments, we can create inclusive environments that not only meet legal requirements but also enhance the quality of life for all users. Each design choice can contribute to a more accessible, welcoming, and enjoyable outdoor experience.
In summary, an inclusive approach to outdoor design can foster community engagement and ensure that all individuals have the opportunity to enjoy public spaces safely and comfortably. As we move forward, let’s prioritize accessibility to make our outdoor environments truly for everyone.
Understanding Hazardous and Noxious Plant Species in Outdoor Design
Introduction
When designing outdoor spaces, it’s crucial to be aware of the potential hazards posed by certain plant species. This section outlines various hazardous and noxious plants, their characteristics, and their implications for public safety and comfort.
Table 240-2: Hazardous and Noxious Plant Species
This table categorizes plants based on their potentially harmful characteristics. Here’s a summary of the information included:
| Species | Comments |
|---|---|
| Holly, Yew, Privet, Laurel, Rhododendron | Bright-colored berries or leaves may tempt children, posing ingestion hazards. |
| Crab Apple, Plum, Cherry, Oak, Chestnut, Hickory, Walnut | Long, slippery fruits and nuts can create tripping hazards and stain clothing if sat upon. |
| Pines, Spruce, Fir, Larch, Hemlock | Decorative cones may obstruct pathways for pedestrians and small-wheeled vehicles. |
| Sweetgum, Sycamore, London Plane Tree, Honey Locust, Maple | Pods can create unsafe footing and hinder movement for small-wheeled vehicles. |
| Birch, Silver Maple, Box Elder, Horse Chestnut, Poplar, Willow, Tulip Tree, Elm | Branch debris complicates mobility and large branches may cause injury or property damage. |
| Birch, Willow, Pin Oak, Beech, Magnolia | Low-hanging branches can cause facial injuries and hazards for motorists. |
| Willow, Red Maple, Silver Maple, Beech, Cottonwood, Poplar | Surface root systems can create uneven walkways, posing tripping hazards, especially for small-wheeled vehicles. |
| Siebold Viburnum, Female Ginkgo, Mimosa | Foul odors may deter use of outdoor spaces and make individuals nauseous. |
| Barberry, Quince, Hawthorne, Locust, Holly, Rose Varieties, Privet | Thorns and spikes pose physical dangers, especially for those in light footwear or barefoot. |
| Fruit Trees (e.g., Crab Apple, Cherry, Plum) | Attract pests, which can cause severe allergic reactions in sensitive individuals, making them unsuitable near pedestrian areas. |
Design Considerations for Trash Receptacles (Figure 240-16)
Trash receptacle design plays a vital role in maintaining the cleanliness and usability of outdoor spaces. Here are key considerations:
- Climate Adaptability: The design should be suitable for various climates, ensuring that receptacles can withstand rain, snow, and extreme temperatures.
- Ease of Use: Trash receptacles must be easily accessible and operable for all users, including individuals with disabilities.
- Waste Management: Effective designs should facilitate proper waste segregation (e.g., recyclables vs. general waste) to promote environmental sustainability.
Implications of Plant Characteristics
Debris Management
- Fruits and Nuts: Can lead to slippery surfaces, posing a hazard for pedestrians.
- Branches: Breakage from certain species can create safety concerns, blocking pathways and posing injury risks.
Physical Hazards
- Thorns and Spikes: Plants with these features can cause injury upon contact, necessitating careful consideration in high-traffic areas.
- Shallow Roots: Roots may cause uneven surfaces, leading to tripping hazards.
Aesthetic and Sensory Considerations
- Odor: Some plants produce unpleasant smells that can detract from the enjoyment of outdoor spaces.
- Insects and Pests: Certain species attract pests that can become a nuisance and pose health risks to visitors.
Conclusion
When planning outdoor environments, understanding the implications of hazardous and noxious plant species is crucial. Designers must consider both the safety and comfort of all users, ensuring that spaces are inviting, accessible, and free from hidden dangers. Additionally, integrating appropriate waste management solutions will enhance the overall functionality and aesthetic appeal of public areas.
As we strive for inclusive and sustainable designs, ongoing assessment of plant species and receptacle designs will be vital in maintaining safe and enjoyable outdoor spaces for everyone.
Outdoor Stairs and Landings
Stairways:
Stairways present significant barriers and safety risks for individuals with physical impairments, with a notable percentage of accidents among severely visually impaired individuals occurring at level changes. ADAAG regulations prohibit open risers. Detailed specifications regarding treads, risers, nosings, handrails, and detectable warnings are outlined in ADAAG 4.9 Stairs.
Landings:
Outdoor landings adjacent to stairways must be sufficiently sized to facilitate the movement of individuals, particularly those requiring assistance. The maximum height between landings should be 1,500 mm (5 ft) to maintain visual coherence and psychological accessibility between levels, with lower heights preferred.
4.3 Outdoor Ramps
Ramps are essential for wheelchair users, though they may still pose challenges for others. Ideally, both stairs and ramps should be available. Ramps require level landings at both the top and bottom, as well as between ramp runs. Adequate clear floor space is necessary for maneuvering on and off the ramp (Refer to ADAAG 4.8.4 Landings).
4.4 Handrailings
Hand railings enhance safety and assist with mobility, orientation, and cognitive mapping of environments. Many individuals find it difficult to navigate stairs, ramps, and uneven surfaces without handrails. In recreational contexts, ropes with knots have served as orienteering aids for individuals with visual impairments (Refer to ADAAG 4.9.4 Stair Handrails; ADAAG 4.8.5 Ramp Handrails).
4.5 Walls, Benches, and Outdoor Seating
Outdoor seating often neglects the needs of a diverse user group. Features such as armrests are crucial for assisting individuals in and out of seated positions, and adequate heel space is necessary for easier rising from seated positions. Wheelchair users also benefit from designated areas for resting and placing packages (Refer to ADAAG 4.32 Fixed or Built-in Seating and Tables; ADAAG 4.33 Assembly Areas).
4.6 Walkway Furnishings
Walkway furnishings must be organized for safety and ease of navigation. Furnishings should be detectable by cane users, either directly or through hazard strips that separate them from clear walking areas.
4.7 Parking and Passenger Loading Zones
The minimum number of accessible spaces in self-parking lots is specified in Table 240-1. “Universal” Parking Space Design recommends that all accessible spaces measure 3,300 mm (11 ft) wide with a 1,500 mm (5 ft) access aisle, accommodating increasing use of vans with lifts or ramps (Refer to ADAAG 4.6 Parking and Passenger Loading Zones).
4.8 Bus Shelters and Lifts
All bus shelters should provide an unobstructed view of traffic for both standing and seated individuals. The drop-off zone must be integrated into the accessible route. The adjacent street should not have a high crown that would affect bus lift deployment, with a maximum curb height of 200 mm (8 in) to accommodate standard lifts.
4.9 Outdoor Plantings, Lawns, and Gardens
Planting:
Planting along public walkways should avoid hazards. Trees and plants that pose risks, such as those that break easily under ice, drop excessive litter, or produce harmful fruits, should be chosen carefully. Microclimate control is particularly beneficial for elderly and disabled individuals.
Lawns:
Many users wish to sit on grass, including those with mobility impairments. Site topography should be considered, and transfer walls should be integrated where feasible for easier access to grassy areas.
Gardens:
Gardens should be designed to offer enjoyment and should cater to a wide variety of users, including those with visual impairments and wheelchair users. Sensory-rich environments are particularly engaging, providing opportunities for tactile and aromatic interactions (Refer to Figure 240-24 for raised planting designs).
4.10 Outdoor Lighting
Adequate lighting is crucial in potentially hazardous areas. Fixtures must not protrude into accessible routes, and increased illumination levels benefit individuals with limited vision. Visual alarms should be integrated with audible alarms where necessary (Refer to ADAAG 4.4 Protruding Objects; ADAAG 4.28.3 Visual Alarms).
4.11 Signage
Clear, precise signage is essential for navigation, providing identity, accessibility information, warnings, and directional guidance. International symbols, including the International Symbol of Accessibility, should be displayed at designated locations. Placement, scale, and graphic consistency are critical for visibility from various heights, including both seated and standing positions.
Key Design Considerations
- Details for accessibility must comply with specific legal dimensions.
- Material selection can serve as visual and tactile cues for accessibility.
- Avoid hazards associated with design elements, especially with plant materials.
- Consult ADAAG for specific design information and requirements.
By prioritizing accessibility in outdoor environments, we ensure a universally comprehensible and navigable space for all users.
1. Design Standards for Recreation Trails (Table 240-6)
- Access Routes:
- Clear Width:
- Easier: 1200 mm (48 in)
- Moderate: 900 mm (36 in)
- Difficult: 700 mm (28 in)
- Sustained Running Grade:
- Easier: Max 5%
- Moderate: Max 8%
- Difficult: Max 12%
- Maximum Grade Allowed:
- Easier: Max 10% (30 ft)
- Moderate: Max 14% (50 ft)
- Difficult: Max 20% (50 ft)
- Cross Slope:
- Easier: Max 3%
- Moderate: Max 5%
- Difficult: Max 8%
- Passing Space Interval:
- Easier: Max 60,000 mm (200 ft)
- Moderate: Max 90,000 mm (300 ft)
- Difficult: Max 120,000 mm (400 ft)
- Rest Area Interval:
- Easier: Max 120,000 mm (400 ft)
- Moderate: Max 270,000 mm (900 ft)
- Difficult: Max 360,000 mm (1200 ft)
- Clear Width:
2. Degree of Access for Recreational Trails (Table 240-7)
- Access Levels:
- Easier: Highly developed areas (urban/rural)
- Moderate: Moderately developed areas (natural)
- Difficult: Minimally developed areas (backcountry)
- Most Difficult: No development (primitive)
3. Outdoor Recreation Access Route
- The Outdoor Recreation Access Route connects essential elements of a developed recreation site.
- ADAAG 4.3 guidelines should be followed.
- Universal Design Symbols for Recreation are recommended.
4. Hiking Trails
- General: Trail systems should accommodate a wide variety of users, providing diverse challenges.
- Signage: Should match the trail type and clearly mark hazardous areas. Information on grade, cross-slope, width, surface, and trail distance should be posted.
5. Interpretive Trails
- Design should allow varying difficulty levels and provide diverse experiences.
- Signage: Comprehensive system needed, including maps in raised relief, difficulty classification, and essential messages about features and safety.
6. Outdoor Camping and Picnicking
- Camping: Sites should offer diverse recreational opportunities and be accessible. Facilities must comply with ADA guidelines.
- Picnicking: Tables should accommodate wheelchairs, with clear spaces and appropriate height.
7. Cooking Facilities
- Ground spaces around fire rings and grills should be level and clear of obstructions.
- Fire rings must be designed to specific heights based on site development levels.
This overview encapsulates the essential design standards and guidelines for accessible recreation trails, ensuring they are usable by a broad spectrum of the population.
Pedestal Grills
- Height: Cooking surface should be 750-900 mm (30-36 in) above ground.
- Rotation: Must rotate 360 degrees for wind adjustment.
- Knee Clearance: At least 675 mm (27 in) of clearance.
Water Fixtures
- Spout Height: Maximum height of 900 mm (36 in) for faucets and drinking fountains.
- Operability: Should be easily operable and placed on stable surfaces with adequate drainage.
Swimming Facilities
- Access: Various means of access to swimming pools, including ramps (10% maximum slope), transfer tiers, and lifts.
- Coping Height: Should be at sitting height with grab bars.
- Underwater Seating: Necessary for resting; should be identifiable and isolated from jump-in areas.
Beaches
- Accessibility: Routes to beaches should be provided; gradients into water should be at most 10%.
- Safety Features: No drop-offs or sharp objects; accessible routes should extend 900 mm (36 in) beyond the high tide mark.
Fishing and Boating
- Fishing Stations: Should be located close to accessible parking and be designed for stability with proper surfaces, safety rails, and seating for companions.
- Boating Access: Docks should be 450-600 mm (18-24 in) high to ease boarding, with support devices and safety railings.
Spectator Areas
- Accessibility: Should be reachable via ramps and stairs; wheelchair seating areas should have companion seating and be located near access ramps.
Parks and Playgrounds
- Continuous Accessible Route: Must connect all play areas and promote social interaction.
- Equipment Design: Should include both structured and unstructured play opportunities, with surfaces meeting safety standards.
Jogging Paths
- Design Considerations: Should accommodate all users, providing visual and textural cues for orientation. Signage should be accessible to all abilities.
General Recommendations
- Ensure hard surfaces and ramps throughout facilities.
- Provide appropriate signage for all user groups.
- Avoid hazardous elements and ensure amenities are centrally located.
This framework promotes inclusivity in recreational spaces, ensuring that individuals with various abilities can access and enjoy them safely.
Natural Hazards: Earthquakes
1.0 Introduction
Earthquakes are vibrations of the earth’s crust caused by subterranean ground faults or movements. They can cause injury or death to people and animals, as well as damage or destruction to structures and landscapes. Earthquakes create primary hazards such as surface rupturing, land displacement, ground shaking, earthquake-induced ground failures, and oscillation of water surfaces. Secondary hazards include landslides, fires, floods, subsidence, and tsunamis.
This section focuses on how potential risks associated with earthquakes influence land use planning and the design and engineering of landscapes, structures, and infrastructure systems. Professional expertise is assumed to determine detailed design and engineering requirements for large man-made structures and major earthworks.
2.0 Causes of Earthquakes
2.1 Plate Tectonics
The earth’s crust and upper mantle consist of rigid plates, 80 to 100 km (50 to 60 miles) thick, that move slowly and continuously over the interior of the earth. This movement results in pressure, separation, or sliding at the edges of the plates. Strain accumulates, eventually causing faults along boundaries when the plates slip abruptly, leading to an earthquake.
2.2 Other Causes
Other causes of earthquakes include:
- Volcanic activity
- Injection of liquid wastes into susceptible rock strata
- The weight of large dams and their reservoirs
3.0 Measurement
Intensity and magnitude are two types of measurement used to determine earthquake severity.
- Intensity describes the degree of shaking at a specified location, commonly measured by the modified Mercalli scale.
- Magnitude indicates the size of an earthquake, independent of observation location, typically measured by the Richter scale.
4.0 Effects of Earthquakes
Earthquakes create various physical actions and reactions:
4.1 Faults and Fault Displacements
A fault is a fracture in the earth’s crust, while fault displacement refers to the movement along the fault caused by an earthquake. This movement can be horizontal, vertical, or both, ranging from a few centimeters to several meters.
4.2 Ground Shaking and Directions of Seismic Waves
Ground shaking occurs when a fault ruptures, generating seismic waves that cause vibrations in the ground. The frequency and amplitude of these vibrations are influenced by several factors, including the distance to the focus of the earthquake and the structural properties of the surrounding soil and bedrock.
4.3 Earthquake-Induced Ground Failures
Earthquake-induced ground failures can manifest as:
- Liquefaction: A temporary condition in which seismic waves pass through saturated granular materials, causing them to behave like a fluid and lose their bearing capabilities. This is most dangerous in marshes, wetlands, and shorelines.
- Lateral Spreads: Occur when the earth’s surface moves over a subsurface plane, particularly on flat slopes. These can range from a few meters to over 30 meters, especially in flood plains.
5.0 Assessing Earthquake Risks and Losses
Understanding the effects of earthquakes is crucial for assessing risks and losses related to land use planning, design, and construction. Special considerations should be taken for potential ground failures, retaining walls, bridges, buildings, and adherence to building codes.
6.0 Land Planning, Design & Construction in Seismic Zones
Effective land planning and engineering design are critical in seismic zones to mitigate risks associated with earthquakes. Responses to potential ground failures and the structural integrity of buildings and other infrastructures must be rigorously evaluated to minimize hazards and ensure safety.
Flow Failures: A Comprehensive Overview
Definition and Mechanism
Flow failures represent one of the most catastrophic types of ground failures, characterized by the movement of large blocks of intact material over a layer of liquefied materials. These flows can cover substantial distances, reaching up to 1.5 km² (1 mile²) and can travel at speeds that may exceed tens of kilometers per hour. Flow failures commonly occur on slopes with inclinations greater than 6 or 7 percent, particularly in regions with saturated sands or silts.
Implications of Flow Failures
When flow failures occur underwater, they have the potential to generate significant sea waves or tsunamis, which can inflict damage on populated coastlines.
Seismic Hazard Assessment
To mitigate the risks associated with earthquakes, a systematic assessment of seismic hazards and risks is crucial. The following steps are recommended for effective evaluation and mitigation:
- Evaluate Seismic Hazards and Risks:
- This involves estimating the predicted location, duration, and intensity of future earthquakes, despite the current limitations in predicting seismic events.
- Determine the Design Earthquake:
- Establish the hypothetical maximum event expected on the largest fault in the area, considering the seismic history, tectonic structure, and fault length.
- Seismic Inventory and Zonation:
- Map the area for its potential for various seismic hazards (surface faulting, ground shaking, liquefaction, etc.) and create composite maps to indicate total seismic risks.
- Evaluation of Land Uses and Structures:
- Assess the vulnerability of different land uses and structures to earthquake-related damages, focusing on existing and proposed developments.
- Regulations Based on Seismic Risk:
- Implement building codes and land use regulations to minimize seismic risks, ensuring compliance with established guidelines.
- Assess Impacts on Major Structures:
- Identify measures to avoid or mitigate seismic risks for structures and systems within the study area.
Construction in Seismic Zones
Building in or near seismically active areas presents significant risks. When construction cannot be avoided, several guidelines can help mitigate potential seismic hazards:
- Consultation with Professionals:
- Engage with engineers specializing in seismic hazards to identify risks and determine appropriate mitigation measures.
- Avoid Fault Lines:
- Major structures should not be situated near fault lines. In identified hazard areas, deep foundations or pilings may be necessary.
- Hillside Development Precautions:
- Development on hillsides and ridges, which amplify seismic vibrations, should be avoided when possible.
- Retaining Devices Orientation:
- Place retaining devices perpendicular to the anticipated seismic wave direction to enhance stability.
- Building Design Considerations:
- Structural design should prioritize minimizing damage, favoring square or rectangular plans and ensuring adequate capacity to absorb seismic forces.
Key Design and Structural Considerations
- Structural Massing and Continuity:
- The massing and continuity of building elements significantly impact the structure’s ability to withstand seismic forces.
- Response to Seismic Waves:
- Structures vibrate at various frequencies, and differences in these frequencies can lead to collisions and damage.
- Torsional Effects:
- The design must account for torsional movements, particularly in structures with asymmetrical designs.
Conclusion
Understanding flow failures and their implications is vital for risk management in seismic zones. By implementing comprehensive seismic assessments, adhering to guidelines, and ensuring robust structural designs, the risks associated with seismic activity can be significantly mitigated.
Time-Saver Standards for Landscape Architecture
CONTENTS
- Introduction
- Landslides
- 2.1 Types of Landslides
- 2.2 Causes of Landslides
- 2.3 Estimation of Landslide Hazard
- 2.4 Landslide Loss Prevention and Reduction
- Snow Avalanches
- 3.1 Causes and Types of Snow Avalanches
- 3.2 Estimation of Avalanche Hazard
- 3.3 Avalanche Loss Prevention and Reduction
- Sources of Technical Information and Assistance
- References
1.0 Introduction
This section describes the hazards of landslides and snow avalanches. Landslides are defined as the mass movement of any combination of rock or soil down a slope, resulting from the action of gravity and climate on geologic materials. Snow avalanches are defined as the rapid downward movement of a mass of snow, often carrying ice, rock, and debris that contribute to its potential destructiveness.
2.0 Landslides
2.1 Types of Landslides
The classification of landslides is primarily based on the type of mass movement and the material involved. Landslides are also described by their velocity.
Movement: The type of movement is one of the principal criteria for classifying landslides. The five distinct types of landslide movement are outlined in Table 253-1. Complex landslides may consist of two or more movement types occurring in succeeding stages.
Material: Landslides can be described as either rock or soil, with soil further divided based on particle size into earth (fine soil particles) or debris (coarse particles).
Velocity: The landslide velocity scale (Table 253-2) indicates that the destructive significance of a landslide is often affected by the velocity of movement. Extremely rapid landslides (over 5 m/sec or 17 ft/sec) make escape unlikely, while very slow movements (less than 1.6 m/year or 5 ft/year) may cause little to no noticeable damage.
2.2 Causes of Landslides
Landslides occur when the strength of the mass of soil or rock on a slope is less than the gravitational pull acting upon it. The balance of forces can shift by increasing the weight of materials or decreasing their resistance to sliding. Common causes of landslide movement are listed in Table 253-3, and geologic conditions that are highly susceptible to landslides are described in Table 253-4.
Landslides often accompany flooding or heavy rains. Wet conditions increase the slope’s weight and decrease the friction between soil particles. Erosion or cuts at the base of a slope can also lead to sliding. Earthquakes and human activities, such as construction and vegetation removal, are significant contributors to landslides.
Common Human Activities that Increase Landslide Potential:
- Placement of heavy fill materials on a slope.
- Construction of roads, buildings, and other structures.
- Use of on-site sewage disposal systems, ponds, and sprinkler systems.
- Grading that undercuts the toe of vulnerable slopes.
2.3 Estimation of Landslide Hazard
Figure 253-2 depicts a landslide susceptibility map developed by the U.S. Geological Survey, based on physical conditions and recorded landslide occurrences. This data aids in assessing the landslide potential of a region during land planning. More detailed hazard maps have been prepared for regions with severe landslide problems.
Preliminary investigations of a site by a geological engineer, including air photo analyses, can indicate whether comprehensive geotechnical studies are necessary. Aerial photographs reveal former landslide locations and zones of sliding activity through characteristic landforms.
2.4 Landslide Loss Prevention and Reduction
To prevent damage from landslides, it is essential to avoid developing in areas prone to sliding. Regulation of future development through zoning, subdivision, and sanitary regulations can help reduce landslide hazards.
Regulation Methods:
- Zoning restrictions on intensive development.
- Subdivision regulations that reserve landslide hazard areas for open space.
- Sanitary regulations that limit potentially triggering systems.
Prevention and Correction: Stabilizing slopes is complex and should involve expert consultation. Table 253-6 describes methods for stabilizing soil slopes, including excavation, drainage, vegetation, and restraining structures.
Key Stabilization Methods:
- Excavation: Reduces driving force and increases resistance by removing material from the slope.
- Drainage: Controls surface and subsurface water to prevent saturation and sliding.
- Vegetation: Helps anchor earth volumes and reduce water infiltration.
- Restraining Structures: Should be used as a last resort due to their high cost.
3.0 Snow Avalanches
3.1 Causes and Types of Snow Avalanches
Avalanches occur primarily due to factors like slope angle, snowpack conditions, weather events, and human activities. They can be categorized based on the type of snow involved (wet vs. dry), the type of movement (slab, loose snow), and the triggering mechanisms.
3.2 Estimation of Avalanche Hazard
Estimating avalanche hazard involves assessing snowpack stability, terrain features, and weather conditions. Avalanche hazard maps and forecasting are crucial for planning and safety in avalanche-prone areas.
3.3 Avalanche Loss Prevention and Reduction
Prevention strategies include land use planning, public education, and avalanche control measures. Establishing boundaries for development in avalanche-prone zones and creating controlled avalanche paths can significantly reduce risks.
Sources of Technical Information and Assistance
Professional organizations and government agencies provide resources and assistance for landslide and avalanche hazard assessment and management.
This text provides a detailed overview of landslide and avalanche hazards, their indicators, mitigation strategies, and methods for risk reduction. Here’s a summary of the key points:
Features Indicating Landslide Potential
- Structural Damage: Signs include broken pipes, cracks in structures, and misaligned features.
- Topographical Indicators: Hummocky terrain, abrupt slope changes, and scarps indicate past or ongoing sliding.
- Vegetation Anomalies: Incongruent vegetation patterns and “jackstrawed” trees can signal instability.
- Hydrological Indicators: Hillside ponds, seeps, and debris accumulation indicate previous slide activity.
- Soil Characteristics: Changes in soil tone and bedding planes can reflect landslide risk.
Importance of Identifying Landslide Features
Recognizing these features helps in assessing landslide risks and determining areas requiring geotechnical investigation and potential intervention. Monitoring techniques, such as assessing the width of cracks, can provide insight into landslide activity.
Mitigation Measures for Landslide Hazards
- Avoidance: Development should be restricted in high-risk areas.
- Retaining Structures: Techniques include live wooden crib walls, caisson walls, and buttresses to stabilize slopes.
- Geotechnical Investigations: Comprehensive studies should be conducted in landslide-prone areas to inform design and stabilization strategies.
Avalanche Hazards
- Causes: Avalanches occur when the weight of snow exceeds the snow pack’s shear strength, typically on slopes over 20 degrees.
- Types of Avalanches:
- Point Release Avalanches: Small, often involve loose snow.
- Slab Avalanches: Large, cohesive layers of snow that fracture and slide.
Estimating Avalanche Hazards
Mapping previous avalanche occurrences and analyzing local weather patterns are essential for risk assessment. Detailed maps help in planning and development.
Avalanche Loss Prevention
- Regulatory Measures: Legislation in various countries restricts development in avalanche-prone areas.
- Structural Control: Methods include snowpack stabilization, avalanche nets, and catchment ditches to mitigate risks.
- Prevention Techniques: Controlled avalanches and compaction of snow can reduce hazards.
Conclusion
Understanding the signs of landslide and avalanche risks, coupled with effective mitigation strategies, is crucial for protecting infrastructure and lives in vulnerable areas. Regular assessments and proactive measures can significantly reduce the potential for damage from these natural hazards.
Understanding Natural Hazards: Landslides, Avalanches, and Subsidence
Natural hazards can pose significant risks to communities, infrastructure, and ecosystems. Among these hazards, landslides, avalanches, and subsidence are particularly concerning due to their sudden onset and potential for widespread damage. Understanding these hazards, their causes, and effective mitigation strategies is crucial for enhancing community resilience.
1. Landslides: Causes and Prevention
Causes of Landslides
Landslides occur when the stability of a slope is compromised, leading to the downward movement of soil and rock. Factors contributing to landslides include:
- Heavy Rainfall: Prolonged rainfall can saturate soil, increasing its weight and reducing friction between soil particles.
- Earthquakes: Seismic activity can destabilize slopes, particularly in areas with loose soil or rock.
- Human Activity: Construction, mining, and deforestation can alter natural landscapes and increase the risk of landslides.
Mitigation Strategies
To reduce the risk of landslides, communities can implement various strategies:
- Terracing: Creating terraces on steep slopes can reduce water runoff and soil erosion.
- Reforestation: Planting trees helps stabilize soil with their root systems, reducing erosion.
- Drainage Control: Installing proper drainage systems can divert excess water away from vulnerable slopes.
2. Avalanches: Understanding and Mitigation
Avalanche Dynamics
Avalanches occur when a mass of snow rapidly descends down a slope. Factors influencing avalanche formation include:
- Snowpack Stability: Layers of snow can become unstable due to temperature changes, wind loading, or heavy snowfall.
- Terrain: Steeper slopes (typically 30 to 45 degrees) are more prone to avalanches.
Mitigation Techniques
Effective avalanche mitigation strategies include:
- Avalanche Fencing: Structures such as snow fences can help control snow accumulation and reduce the risk of avalanches.
- Controlled Explosions: In ski resorts and avalanche-prone areas, controlled explosions can be used to trigger smaller avalanches safely.
- Education and Awareness: Educating communities and outdoor enthusiasts about avalanche risks and safe practices is essential for prevention.
3. Land Subsidence: Causes and Prevention
Understanding Subsidence
Land subsidence refers to the sinking or settling of the ground surface. Common causes include:
- Soil Compaction: Overloading of soil, particularly in urban areas, can lead to gradual settling.
- Extraction of Subsurface Resources: Activities such as mining, groundwater withdrawal, or oil extraction can create voids, resulting in surface collapse.
Preventative Measures
To mitigate land subsidence risks, strategies may include:
- Zoning Regulations: Implementing land use controls to restrict development in high-risk areas.
- Monitoring and Assessment: Regular surveying can help identify subsidence patterns and potential hazards.
- Engineering Solutions: In areas at risk, constructing buildings on pilings or floating foundations can prevent damage from subsidence.
4. Community Engagement and Awareness
Community awareness is vital in mitigating the impacts of these natural hazards. Local governments and organizations can promote safety through:
- Public Workshops: Offering education sessions on recognizing hazards and emergency preparedness.
- Mapping Hazard Zones: Creating and distributing maps that highlight areas at risk for landslides, avalanches, and subsidence.
- Emergency Response Plans: Developing and practicing emergency response plans ensures that communities are prepared for natural disasters.
Conclusion
Understanding the dynamics of natural hazards such as landslides, avalanches, and subsidence is essential for protecting communities and infrastructure. Through effective mitigation strategies and community engagement, we can reduce the risks associated with these hazards and foster a culture of preparedness and resilience.
By staying informed and proactive, communities can better withstand the impacts of natural disasters and safeguard their environments for future generations.
Underground Mining
Underground mining of solid materials, particularly shallow coal workings, significantly contributes to subsidence hazards. The construction of tunnels near the surface often leads to surface settlement. When the tunnel is driven into weak or inadequately supported material, a process known as caving or stopping may occur. This involves the collapse of the roof rock, creating a void above. As this caving process repeats, the void can migrate upward, eventually resulting in sinkholes on the surface.
Effects of Mining on Surface Stability
Figures 254-4 and 254-5 illustrate the implications of mining activities. Figure 254-4 shows the impact of mine collapse, while Figure 254-5 highlights the general locations of coal fields in the United States. In regions with coal deposits, it is crucial to recognize subsidence from previous mining as a potential hazard.
If abandoned mine workings are present on a site, various engineering methods have been developed to mitigate risks. However, these solutions can be costly and often involve a degree of uncertainty. Consequently, avoiding construction on such sites is the preferred approach.
Challenges in Predicting Subsidence
Calculating anticipated subsidence due to tunneling or mining is complex due to limited knowledge of subsurface conditions during tunneling, the properties of materials involved, and intricate spatial factors. Often, records of mining operations are incomplete, complicating the identification of exact tunnel locations.
Pillar and Stall Mining: A common extraction method, also known as room and pillar mining, involves removing coal while leaving rectangular pillars to support the roof. This creates an underground maze of caverns. In situations where future subsidence must be mitigated, shallow workings can be grouted using cement slurry injection. However, this process can be expensive and may be ineffective in water-saturated conditions.
Figure 254-6 illustrates the hydraulic backfilling technique, allowing complete void filling with only a single injection well for areas up to 1.2 hectares (3 acres).
3.3 Solution Mining
Solution mining, which removes soluble materials like salt, gypsum, or potash by injecting water to dissolve them, can also lead to serious subsidence hazards. The challenge arises from the difficulty in identifying the boundaries of the affected area, as large subsurface voids created by this process are susceptible to collapse, similar to naturally occurring cavities in limestone regions.
Implications of Solution Mining
- Maze of Caverns: The underground caverns created by mining complicate predictions of subsidence. Techniques like grouting can be employed in areas where future subsidence must be prevented.
- Assessing Hazard: Identifying the extent of subsidence caused by solution mining is difficult, necessitating careful planning and mitigation strategies.
- Construction Considerations: When construction is unavoidable in areas prone to subsidence, careful design of drainage systems is essential to avoid concentrating runoff in vulnerable locations.
3.4 Piping
Piping refers to subsurface drainage conduits formed in relatively insoluble soils, caused by the passage of sediment-laden water. This phenomenon is prevalent in weak, incoherent soil layers, such as loess or volcanic ash.
Mechanisms of Piping
Water moves through saturated soil layers towards a free face, carrying sediment and creating small holes that expand into significant underground voids over time. This can result in collapse and the formation of pseudokarst topography.
Types of Piping:
- Desiccation: Stress cracks develop in dry soils, allowing rainfall to penetrate and create drainage conduits.
- Entrainment: Changes in hydraulic head pressures can cause subsurface channeling, leading to sand boils or mud volcanoes.
- Variable Permeability: High hydraulic head can move water through a stratum to the face of an embankment, causing subsurface voids.
Construction Recommendations: It is advisable to avoid construction in piping-prone areas. If construction is necessary, drainage systems should be meticulously designed to prevent runoff concentration in vulnerable areas.
3.5 Removal of Water, Oil, and Gas
The extraction of water, oil, and gas can cause significant subsidence across extensive areas. The extent of subsidence is influenced by the volume of material removed, the depth of extraction, and the rigidity of overlying soil materials.
- Groundwater Withdrawal: Lowering the water table reduces pore pressure, allowing overlying soil to compress, often resulting in dish-shaped depressions or widespread vertical displacement.
- Mitigation Strategies: Engineering methods, such as developing surface water supply systems or importing water to replace extracted materials, can reduce subsidence hazards associated with resource extraction.
4.0 Subsidence in Permafrost Zones
Subsidence also poses a hazard in permafrost regions or areas with substantial underground ice. As temperatures rise or permafrost is disturbed, thawing weakens the support for overlying soils, leading to subsidence. This results in the release of soil particles once held by ice, creating mud-filled depressions.
Engineering Challenges: Thawing causes heaving and the formation of ridges or ice dikes during freezing temperatures, exacerbating subsidence during thawing.
Mitigation Approaches
- Maintaining Thermal Conditions: Preserving permafrost by avoiding additional heat input is crucial. Constructing on insulating pads or thermally isolated pilings can mitigate subsidence risks.
- Vegetation Preservation: Protecting existing vegetation is essential to prevent increased thawing due to sunlight exposure.
5.0 Subsidence Caused by Collapsing or Hydrocompactive Soils
Collapsing Soils: These soils depend on water-soluble minerals for strength. Wetting can dissolve these cements, leading to subsidence and uneven terrain. Areas with loose structures, like loess, are particularly susceptible.
Hydrocompactive Soils: In arid regions, wetting loose, air-filled soils can cause significant subsidence, such as observed in California after irrigation.
Engineering Recommendations
- Geological Assessments: Obtain site-specific geologic reports to assess potential subsidence risks.
- Avoidance Strategies: Whenever possible, avoid construction in areas prone to collapsing or hydrocompactive soils.
- Compaction Techniques: If construction is unavoidable, compact the area with water prior to building to reduce subsidence risk.
6.0 Subsidence Caused by Organic Soils
Highly compressible organic soils, often subjected to drainage for agricultural purposes, can lead to substantial subsidence due to drying, oxidation, and wind erosion.
Management Approaches
Fill Material: If unavoidable, consider adding solid fill until settlement ceases or replacing soft organic material with suitable fill.
Avoidance: Organic soils should generally be avoided for construction.
Natural Hazards: Expansive Soils
Overview
Expansive soils, primarily consisting of clays, exhibit significant volume changes due to moisture content fluctuations. These soils can shrink or swell, leading to potential structural damage. The primary mineral responsible for this behavior is montmorillonite, a member of the smectite clay group, which can swell up to 15 times its dry volume.
Characteristics of Expansive Soils
- Swelling and Shrinking: Expansive soils can increase in volume by more than 1.5 times when wet, exerting swelling pressures that can exceed 480,000 Pa (10,000 psf).
- Damage Potential: Volume increases of 3% or more are considered damaging, necessitating specially designed foundations. Damage from expansive soils often exceeds that from floods, hurricanes, tornadoes, and earthquakes combined.
- Movement Mechanism: Seasonal changes in moisture and water-table levels contribute to differential movement, particularly in a 2-meter (7-foot) zone below the surface.
Signs of Expansive Soils
To assess the presence of expansive soils, consider the following indicators:
- Dry clay exhibiting a soft, puffy texture.
- Sticky soil when wet.
- Visible cracks in dry clay.
- High plasticity when wet, turning hard when dry.
Assessment of Hazard
The plasticity index (PI) of soil helps estimate expansivity:
- 0-14: Non-critical
- 14-25: Marginal
- 25-40: Critical
- Over 40: Highly critical
Laboratory testing is recommended for precise assessments of expansion potential.
Loss Prevention and Reduction Strategies
- Site Selection: Avoid constructing on expansive soils whenever possible.
- Isolation Techniques:
- Replace expansive soil with non-expansive fill where feasible.
- Use piers or piles to elevate structures above expansive soil.
- Flexible Design: Design structures to accommodate movement, such as floating slabs and flexible connectors.
- Soil Treatments:
- Compaction: May reduce permeability and slow expansion, but must be done cautiously to avoid rebound.
- Prewetting: Involves moistening soil before construction to stabilize moisture content but requires careful management to avoid construction issues.
- Heat Treatment: Although heating soils can reduce their swelling capacity, this method is often cost-prohibitive.
Conclusion
Understanding and managing expansive soils is crucial for the safety and longevity of structures. Proper assessment and proactive design strategies can mitigate the risks associated with these natural hazards.
This section discusses various strategies for managing expansive soils, particularly in relation to chemical additives, drainage and surface runoff control, and vegetation management. Here’s a summary of the key points:
Chemical Additives
- Hydrated Lime and Other Chemicals: The application of hydrated lime has proven effective in controlling soil expansivity. The ionic nature of water influences volume changes in expansive soils.
- Methods for Volume Change Control: Various chemical treatments can be used to reduce soil swelling, including:
- Lime Treatment: Reduces swelling through ion exchange and flocculation.
- Cement Treatment: Works similarly through cementation and altering clay minerals.
- Other Chemicals: Hydroxides, chlorides, phosphoric acid, and proprietary “compaction aids” can affect soil properties like plasticity, compaction, and permeability.
- Application Methods: Techniques include removing, mixing, and replacing soil; deep-plowing; and using lime slurry injections.
Drainage and Control of Surface Runoff
- Moisture Barriers: Vertical moisture barriers can isolate soil under structures from surrounding expansive soils. Two common types include:
- Impermeable Barriers: Made from low-grade concrete or ground rubber tires in asphalt emulsion.
- Capillary Barriers: Created with crushed rock to interrupt moisture movement.
- Pre-wetting: The supporting soil should be pre-wetted to 1-2% above the plastic limit before construction.
- Roof Runoff Management: Installing downspouts and drain blocks can direct runoff away from structures. A paved area around buildings can mitigate differential movement caused by moisture changes.
- Foundation Drainage: Caution is advised with slab-on-grade subdrains to prevent backflow during heavy rainfall. The use of impervious backfill and effective runoff control is recommended.
Management of Vegetation
- Impact of Vegetation: Plant roots can desiccate soils, leading to shrinkage during dry seasons. Mature trees generally cause less damage than young, actively growing ones.
- Preventive Actions:
- Maintain good watering practices to prevent excessive soil desiccation.
- Avoid construction within the root zone of existing trees, ideally within a zone equivalent to the tree’s mature height.
- If necessary, consider techniques to manage roots, such as pre-wetting soil, keeping it dry, or installing subterranean impervious barriers.
- Tree Management Post-Construction: If trees are removed, moisture levels must be monitored to prevent future damage. New planting should consider drainage patterns to avoid directing excess water toward vulnerable areas.
Conclusion
Managing expansive soils requires a combination of chemical treatment, effective drainage, and careful vegetation management. Each approach must be tailored to site-specific conditions, with local expertise playing a crucial role in developing effective strategies.
This excerpt discusses various strategies for managing the effects of expansive soils, particularly in relation to construction and landscaping. Here’s a summary of the key points:
Chemical Additives for Soil Control
- Hydrated Lime and Other Chemicals: These are effective in controlling soil expansivity through ion exchange and flocculation.
- Chemical Additives: Various chemicals such as hydroxides, chlorides, and asphalts can improve soil properties, including reducing plasticity and increasing strength. A table summarizes the effects of different methods and additives, including lime and cement treatments, detailing their methods of application and comments on their effectiveness.
Drainage and Surface Runoff Management
- Moisture Barriers: Vertical moisture barriers can isolate structures from surrounding soil. Types include impermeable materials (like low-grade concrete) and capillary barriers made of crushed rock.
- Pre-wetting and Rapid Construction: The supporting soil should be pre-wetted before construction to maintain moisture levels.
- Surface Drainage: Effective drainage systems (like downspouts) should direct runoff away from structures. Sites on mounds are preferred for positive drainage.
Construction Strategies
- Isolation Techniques: Strategies to isolate structures from expansive soils include using non-expansive fill, waterproof membranes, and piers or pilings.
- Floating Slabs and Clear Spaces: Floating slabs in basements can accommodate soil movement; clear spaces under slabs can also help.
- Vegetation Management: Vegetation can impact soil moisture levels, leading to desiccation and shrinkage. Good maintenance practices and proper placement of structures relative to existing trees are crucial.
Recommendations for Vegetation Management
- Watering Practices: Ensure frequent watering to prevent excessive soil desiccation.
- Construction Setback: Avoid building within the root zones of existing trees.
- Soil Moisture Management: If construction is necessary within root zones, consider pre-wetting or maintaining dryness to deter root growth.
- Removal of Problematic Trees: If trees pose a significant risk, consider their removal.
Long-term Considerations
- Soil Moisture Levels Post-Construction: After tree removal, maintain soil moisture levels to prevent further damage.
- New Planting Strategies: Utilize drainage patterns to avoid directing excess water toward structures and consider using barriers to protect new plantings from expansive soil issues.
Conclusion
Effective management of expansive soils involves a combination of chemical treatments, moisture control, strategic construction practices, and careful vegetation management. Local experience and tailored strategies are essential for successful implementation.
About Us
Welcome to Agriculture Novel, your go-to source for in-depth information and insights into the world of agriculture, hydroponics, and sustainable farming. Our mission is to educate, inspire, and empower a new generation of farmers, hobbyists, and eco-conscious enthusiasts. Whether you’re interested in traditional farming practices or modern innovations, we aim to provide comprehensive guides, expert tips, and the latest updates in agriculture and urban farming.
At Agriculture Novel, we believe in the power of knowledge to transform the way we grow, sustain, and nourish our world. Explore our articles on topics like Fruit Growing Guide, Hydroponics, Plant Deficiency Guide, and more.
Thank you for joining us on this journey towards a greener, more sustainable future!
About Agronique Horizon
At Agronique Horizon, we specialize in delivering comprehensive digital marketing and web development solutions tailored for the agriculture and hydroponics industries. From custom website design and app development to social media management, we provide end-to-end support for brands aiming to make a meaningful impact. Our team also offers innovative solutions for the real estate sector, bringing precision and visibility to your projects. Learn more about our services here and discover how we can elevate your digital presence